Showing posts with label blog widget. Show all posts

Saturday, July 27, 2013

How To Add Social Media Icons To Your Blog - Easy Way

Social Media has become an important player in the way we communicate with friends, family and relatives.  The blogging world is also moving towards social media to build up their blog community. Social Media presence have become important for every blogger, if they want to grow their blogging community and to achieve higher traffic for their blog. And, in turns it gives the users of your blog easy access to your blog's content. 
So, let's see - How To Add Social Media Icons To Your Blog:

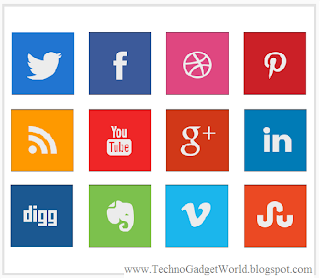
Step 1: Before starting the work on adding social media buttons to your blog or website- you need to get the buttons first. You can get it free or you can buy also. I have downloaded the buttons as shown above in JPEG file format which are squared in shape. If you need round buttons they usually be in PNG format.

Step 2: Once having the buttons, you will have to upload it to Photobucket or any other similar site.

Step 3: Once uploaded, you need to get the URL's of your images now.
  • If you have uploaded your images to Photobucket, you'll can get the URL's of your images on the right hand side. Copy the URL from Direct Link Title content box. 

Step 4: Go to your blogger Dashboard-> Layout-> Click on "Add a Gadget". 

  • From the pop up window list, choose "HTML/JavaScript". 

Step 5: Below is the code Skeleton- Fill all the attributes of the HTML Tag correctly. 
[You can use Notepad/Word Pad to create all the HTML code and then paste it on the HTML/JavaScript Content box]

           <a href="http://www.YourWebsiteAddress.com"target="_blank" >
    <img src="http://www.URLofImageLocation.comheight="70" width="70" /></a> 

Explanation of Code:
  • http://www.YourWebsiteAddress.com : URL for the address of your social media like Facebook,Twitter etc. For example: http://facebook.com/TechnoGadgetWorld 
  • target="_blank" : To make the page open in a New Tab.
  • http://www.URLofImageLocation.com : "Direct Link" URL address from PhotoBucket.
  • height="70" width="70" : Dimensions for your Icon. Change it depending on your requirements.
Repeat all the steps one by one for every social media icon you add. 


Step 6 : Click on "Save" button and "Save the Arrangement". Check your blog to see the changes and click each icons to make sure you have linked it properly.

That's it. If you do the steps correctly you will be going to have the brand new look for your blog/website.

If you have any doubts or suggestions, please do leave your comments below. 

Thursday, July 25, 2013

How To Add Floating Social Media Share Buttons Widget To Blogger

Social networking sites has changed the way we communicate with our family, friends and relatives.

  The same kind of affect is on blogs too. The blogging platform now has become too much social network oriented. To achieve the high traffic for your blogs and to have grasp the larger audience , the bloggers must have social media presence on the web for their blogs.

The Social Media Widget increases traffic and engagement with the world’s most popular sharing buttons for blogs.

Normally, the Social sharing widget is at the end of the posts. The advantage of floating vertical social media share buttons is, they flow with content when the visitor scrolls the page.

So, let's see - How to Add a Social Media Widget To Your Blog:

Step 1: Go to your Dashboard of your blog

Step 2: Click Layout -> Add Widget

Step 3: From the list - Select "HTML/JavaScript"

Step 4: Copy and Paste the below code in the "Content" section 
               [NOTE : Leave "Title" section empty]

<!-- AddThis Button BEGIN -->
<div class="addthis_toolbox addthis_floating_style addthis_32x32_style" style="left:50px;top:50px;">
<a class="addthis_button_facebook"></a>
<a class="addthis_button_twitter"></a>
<a class="addthis_button_pinterest_share"></a>
<a class="addthis_button_linkedin"></a>
<a class="addthis_button_google_plusone_share"></a>
<a class="addthis_button_stumbleupon"></a>
<a class="addthis_button_compact"></a>
</div>
<script type="text/javascript">var addthis_config = {"data_track_addressbar":true};</script>
<script type="text/javascript" src="//s7.addthis.com/js/300/addthis_widget.js#pubid=ra-51f184b5319b19ad"></script>
<!-- AddThis Button END -->

Step 5: Click "Save" button. And, "Save the arrangement" of your blog.

Visit the blog to see the changes.

If you want social media buttons with count on them, please do check the below link. 
Click Here : How To Add Floating Social Media Share Widget With "Numbers" Count To Blogger

If you have any doubts or suggestions, please do leave your comments below.

Tuesday, July 23, 2013

Recent Posts Widget With Thumbnails For Blogger Blog

In this post, we are going to see "How to Add a Recent Posts" widget to your blog. The "Recent Posts" widget with thumbnails will help the blog visitors to find the recent posts quickly. This is one more widget which will help your blog to gain traffic and it even adds a good look to your blog. It will improve the user experience of your blog many folds.


This widget shows the title of the post, thumbnail and a small summary.

So, let's check out "How To Add Recent Posts Widget with Thumbnails"-

Step 1: Go to Blogger Dashboard - Click on Layout

Step 2: Click on "Add a Gadget"

Step 3: Select "HTML/JavaScript" from the list. Copy and Paste the below code.

<style type='text/css'>
img.recent_thumb {padding:1px;width:55px;height:55px;border:0;
float:left;margin:10px;}
.recent_posts_with_thumbs {float: left;width: 100%;min-height: 70px;margin: 5px 0px 5px 0px;padding: 0;font-size:12px;}
ul.recent_posts_with_thumbs li {padding-bottom:5px;padding-top:5px;min-height:65px;}
.recent_posts_with_thumbs a {text-decoration:none;}
.recent_posts_with_thumbs strong {font-size:10px;}</style>
<script style='text/javascript' src='http://recent-post-techkgp.googlecode.com/files/recent%20post_www.techkgp.com.js'></script>
<script style='text/javascript'>
var numposts = 5;
var showpostthumbnails = true;
var displaymore = false;
var displayseparator = true;
var showcommentnum = false;
var showpostdate = false;
var showpostsummary = true;
var numchars = 100;</script>

<script src='http://www.technogadgetworld.blogspot.com/feeds/posts/default?orderby=published&alt=json-in-script&callback=showrecentpostswiththumbs'></script> 


Customization:
  • Change the URL "http://www.technogadgetworld.blogspot.com" with your own blog address.
  • Change the numposts = 5 value with any number of posts you want on your Recent Posts Widget.
  • Change the numchars = 100 value with any number of characters you want to show in summary of Recent Posts.
  • Change the true to false to activate or deactivate any feature of this widget.
Step 4: Now save the widget. And save the arrangement and Visit your blog.

Congrats. You have now added the "Recent Posts" widget on your blog.

If you have any doubts or suggestions. Please comment below.

How to Add Facebook like Box in Blogger Blog

Social networking websites like Facebook, Twitter and Google+ are providing the custom like and follow boxes which can help bloggers to gain dedicated followers to your blog. 
Now a days, social networking sites became an integral part of blogging. Facebook like box can help you to extend your reach and connect to the audience by proving them a mean to join you on Facebook. Which in turn, will help you to grow traffic on your blog too. 


{Note: You have to edit your Blog's template.It is recommended to take a backup of your Blog. First Click on  your Blogger Dashboard - click on template- click on Backup/Restore and download the template from the pop-up window}

So, let's check- How to Add Facebook like Box in Blogger Blog:
  • Now that you have taken the backup, you are ready for the process. Visit the Facebook Developers.
  • You will see a window like the one shown below.

  • Customize the look and feel, height, width of your Like box from the left window and you can see the changes in real-time on right window.
  • Uncheck the show stream, if you don't want the latest posts with this widget.
  • Uncheck the header checkbox, if you don't want to display "Find us on Facebook"(as you can see on our blog).
  • Once you are done with the customization, click on Get code. It would pop-up a window like the one shown below.

  • Click on Edit template from the Blogger dashboard. Copy the "Code A" from the above window and paste it just after the <body> tag.
  • Now save the template and click the Layout button.
  • Click on add a gadget from your sidebar. Add HTML/JavaScript gadget and Paste the "Code B" in it.
  • Now you are done. Save the arrangement and click on View Blog.
Congrats,you just added a Facebook Like Box on your blog.

If you have any doubts or suggestions. Please comment below.

Wednesday, July 17, 2013

How to add Contact Form Widget to Blogger-Easy Way

Blogger has added a new Contact Form Widget which will fit into your Blog’s sidebar.


-Why should I add the new Blogger Contact form?

You don’t have to reveal your email address to the web to provide users with an option to contact you.If you like getting suggestions, queries or any other feedback from the users, make sure that you add the contact form to your blog. 

-How to add the contact form to Blogger?


Follow the below steps-

1.Login to your Blogger Dashboard and Navigate to the Layout Page
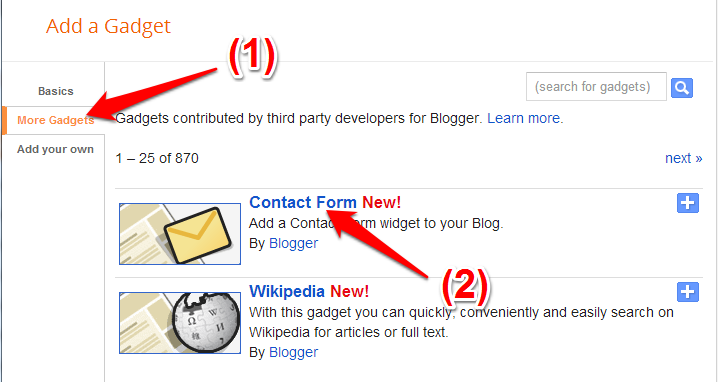
2.Click on the Add a Gadget Link and select More from the left Menu. You can add the add the brand new contact form the right side list
add-contact-form-in-blogger

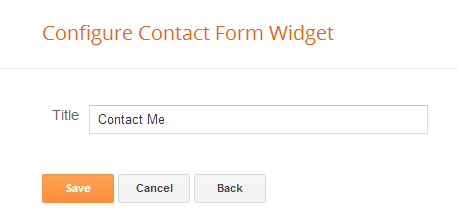
Add any title which you would like. But would be great, if it tells what it is really about?
configure-blogger-contact-form

Now, click on save button. That's it.
The Contact Form added to your Blog’s sidebar.
The contact form has the below input fields
  1. Name – Name of the reader who is sending you a message
  2. Email – Email address of the reader who is sending you a message
  3. Message – The message which the reader wants to send to you.blogger-contact-form 
Above is the snapshot of the "Contact Form".

When the reader sends you a message via the contact form, you will receive it straight into your inbox. 
If you have any further queries on adding the contact form, do let us know and we will be happy to help.
Happy Blogging!

Check out: WordPress or Blogger. Who is the true Winner?
Check out: How to add J Query tool tip to Blogger?

Sunday, May 26, 2013

How To Add Floating Social Media Share Widget To Blogger

You can easily get a floating widget tray for your blog by following these simple steps. Without any delay, let's get it done. 

We need social widgets to get your blog more views. The content which you publish on your blog will be viewed by lot of people. If you do not have any social sharing widgets, there is a less chance of getting your blog more audience. The floating Widget is pictured below...


Traffic boosting Social sharing widget


Normally the Social sharing widget is at the end of the posts. The floating vertical share buttons flow with when the visitor scrolls the page.

It had lot of popular media sites like Facebook, pinterest, twitter and many other. It will definitely boost the traffic of your blog. I suggest strongly that you should have this widget in your blog.

Steps to be taken for installing this widget

1) Go to your "Blog" page

2) Now go to the "Layout" tab

3) Click on "Add a Gadget"

4) From the list select "HTML/JavaScript" widget
   
5) Add the following code in the "Content" Section [NOTE : Keep "Title" section empty]

   <!-- AddThis Button BEGIN -->
<div class="addthis_toolbox addthis_floating_style addthis_counter_style" style="left:03px;top:300px;">
<a class="addthis_button_facebook_like" fb:like:layout="box_count"></a>
<a class="addthis_button_tweet" tw:count="vertical"></a>
<a class="addthis_button_google_plusone" g:plusone:size="tall"></a>
<a class="addthis_counter"></a>
</div>
<script type="text/javascript">var addthis_config = {"data_track_addressbar":true};</script>
<script type="text/javascript" src="//s7.addthis.com/js/300/addthis_widget.js#pubid=ra-516ff8e04b04378b"></script>
<!-- AddThis Button END -->

6) Click on "Save" and see your blog. You have your new floating widget. 

If you want "Pinit", "StumbleUpon", "LinkedIN" buttons, please do check the below link.


If you have any doubts, do leave your comments below.