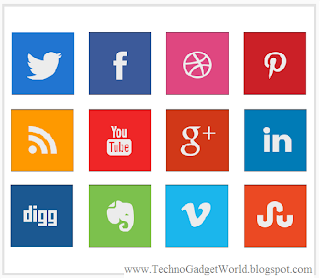
Social Media has become an important player in the way we communicate with friends, family and relatives. The blogging world is also moving towards social media to build up their blog community. Social Media presence have become important for every blogger, if they want to grow their blogging community and to achieve higher traffic for their blog. And, in turns it gives the users of your blog easy access to your blog's content.
 So, let's see - How To Add Social Media Icons To Your Blog:
Step 1: Before starting the work on adding social media buttons to your blog or website- you need to get the buttons first. You can get it free or you can buy also. I have downloaded the buttons as shown above in JPEG file format which are squared in shape. If you need round buttons they usually be in PNG format.
Step 2: Once having the buttons, you will have to upload it to Photobucket or any other similar site.
Step 3: Once uploaded, you need to get the URL's of your images now.
<a href="http://www.YourWebsiteAddress.com"target="_blank" >
<img src="http://www.URLofImageLocation.com" height="70" width="70" /></a>
Explanation of Code:
Step 6 : Click on "Save" button and "Save the Arrangement". Check your blog to see the changes and click each icons to make sure you have linked it properly.
That's it. If you do the steps correctly you will be going to have the brand new look for your blog/website.
If you have any doubts or suggestions, please do leave your comments below.

Step 1: Before starting the work on adding social media buttons to your blog or website- you need to get the buttons first. You can get it free or you can buy also. I have downloaded the buttons as shown above in JPEG file format which are squared in shape. If you need round buttons they usually be in PNG format.
Step 2: Once having the buttons, you will have to upload it to Photobucket or any other similar site.
Step 3: Once uploaded, you need to get the URL's of your images now.
- If you have uploaded your images to Photobucket, you'll can get the URL's of your images on the right hand side. Copy the URL from Direct Link Title content box.
Step 4: Go to your blogger Dashboard-> Layout-> Click on "Add a Gadget".
Step 5: Below is the code Skeleton- Fill all the attributes of the HTML Tag correctly.
[You can use Notepad/Word Pad to create all the HTML code and then paste it on the HTML/JavaScript Content box]<a href="http://www.YourWebsiteAddress.com"target="_blank" >
<img src="http://www.URLofImageLocation.com" height="70" width="70" /></a>
Explanation of Code:
- http://www.YourWebsiteAddress.com : URL for the address of your social media like Facebook,Twitter etc. For example: http://facebook.com/TechnoGadgetWorld
- target="_blank" : To make the page open in a New Tab.
- http://www.URLofImageLocation.com : "Direct Link" URL address from PhotoBucket.
- height="70" width="70" : Dimensions for your Icon. Change it depending on your requirements.
Repeat all the steps one by one for every social media icon you add.
Step 6 : Click on "Save" button and "Save the Arrangement". Check your blog to see the changes and click each icons to make sure you have linked it properly.
That's it. If you do the steps correctly you will be going to have the brand new look for your blog/website.
If you have any doubts or suggestions, please do leave your comments below.


No comments:
Post a Comment